What we tested it with
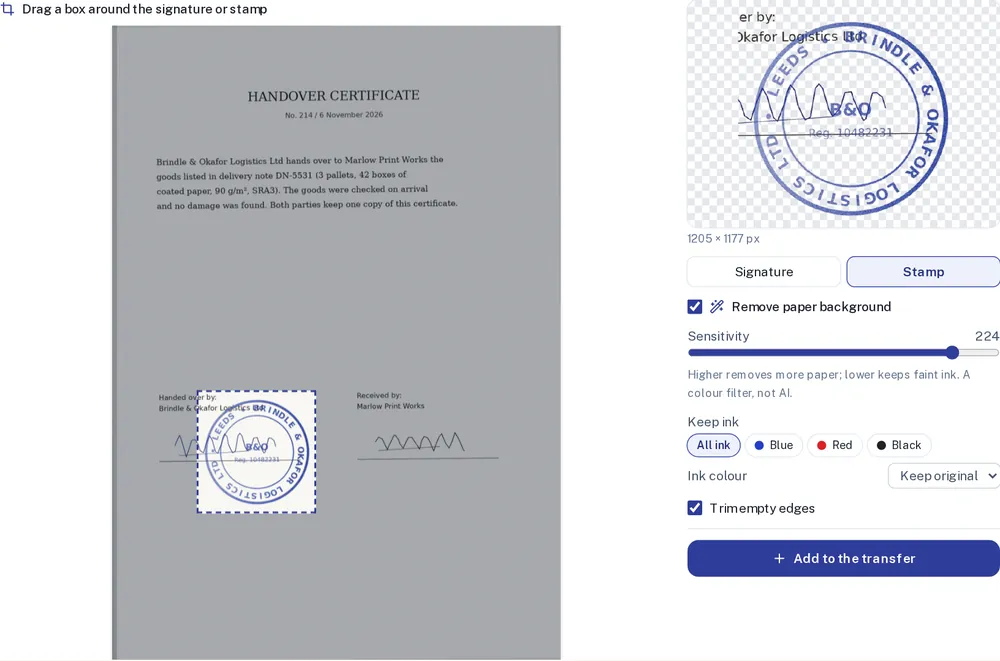
A one-page handover certificate, printed, stamped with a round blue company stamp, signed, and scanned at 200 dpi. The scan came out a little crooked, as scans do. The PDF that needed the stamp was a two-page invoice exported from an office program, with an empty "signature and stamp" box on page 2.
The part that needs a second look: "Keep ink"
The stamp on our certificate sits on top of the printed company name and the signature line. With All ink selected, those printed words came along with the stamp. Switching Keep ink to Blue dropped the black text and the line.
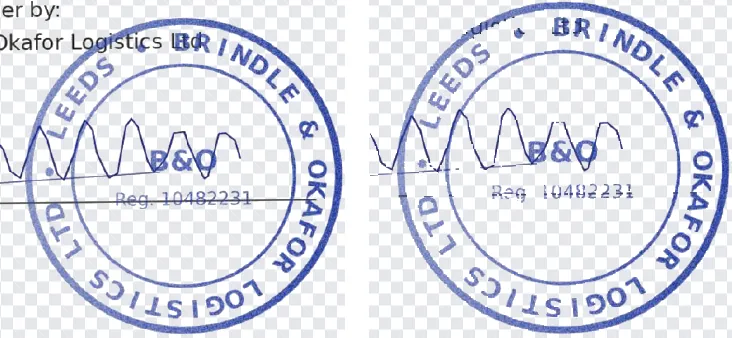
That last point is a real limit: the filter works by colour, so a blue signature crossing a blue stamp cannot be separated from it. If you need the stamp on its own, pick a scan where nobody signed across it. If you want both, that is what the signature and stamp page is for.
Where it lands, and how big
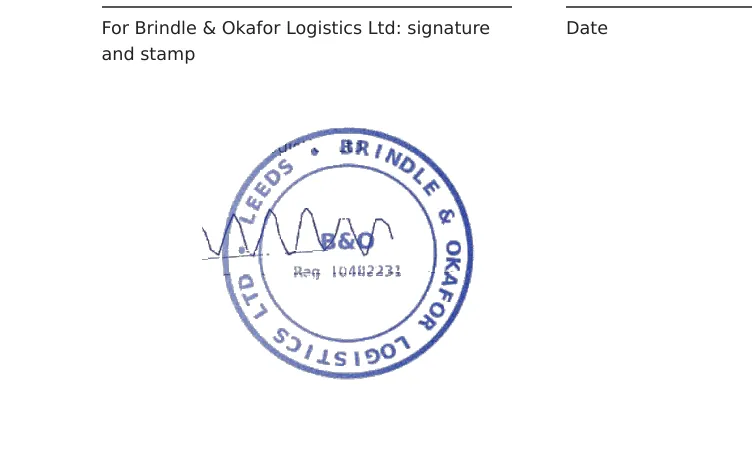
The stamp goes on the last page by default, in the same spot it had on the scan. You can change that to the first page, the same page number, or every page before you continue. In the editor you can still drag it, resize it or rotate it.
Size is taken from the scanned page itself, so you don't need to set anything. On paper our stamp measures 51 mm across; in the finished invoice it measured 53 mm. We also tried the same scan saved as a JPG instead of a PDF: the result was the same width. A JPG or PNG scan is treated as one A4 page, so a photo of only part of a sheet will not keep its real size.
What stays on your computer
Both files are opened by this page in your browser. They are not sent to our server or anywhere else, and the finished PDF is built in the tab and saved straight to your downloads. Before the download you tick one box confirming the stamp is yours, or that you were asked to use it on this document.